Having multiple escalation policies can be very useful as it allows for unique escalation paths for different types and severities of alerts within a single team.
Here are a few tips and tricks to help you optimize your account and workflow with multiple escalation policies.
Tip 1: Reduce the Number of Teams in Your Org
If you have multiple teams with the same users than they can be condensed into one team with different escalation policies and routing keys for separation of alerts. This higher level of organization helps you find who is on-call faster and reduces scheduling headaches.
Tip 2: Create ‘Waiting Rooms’ to Eliminate Middle-Of-The-Night Alerts from Incidents Known to Auto-Resolve
Many of our customers have alerts that auto-resolve within a few minutes, so why wake up at 2 a.m.? In this case, if an incident has not resolved after a period of time, only then should VictorOps page you.
Here’s a trick to fix this:
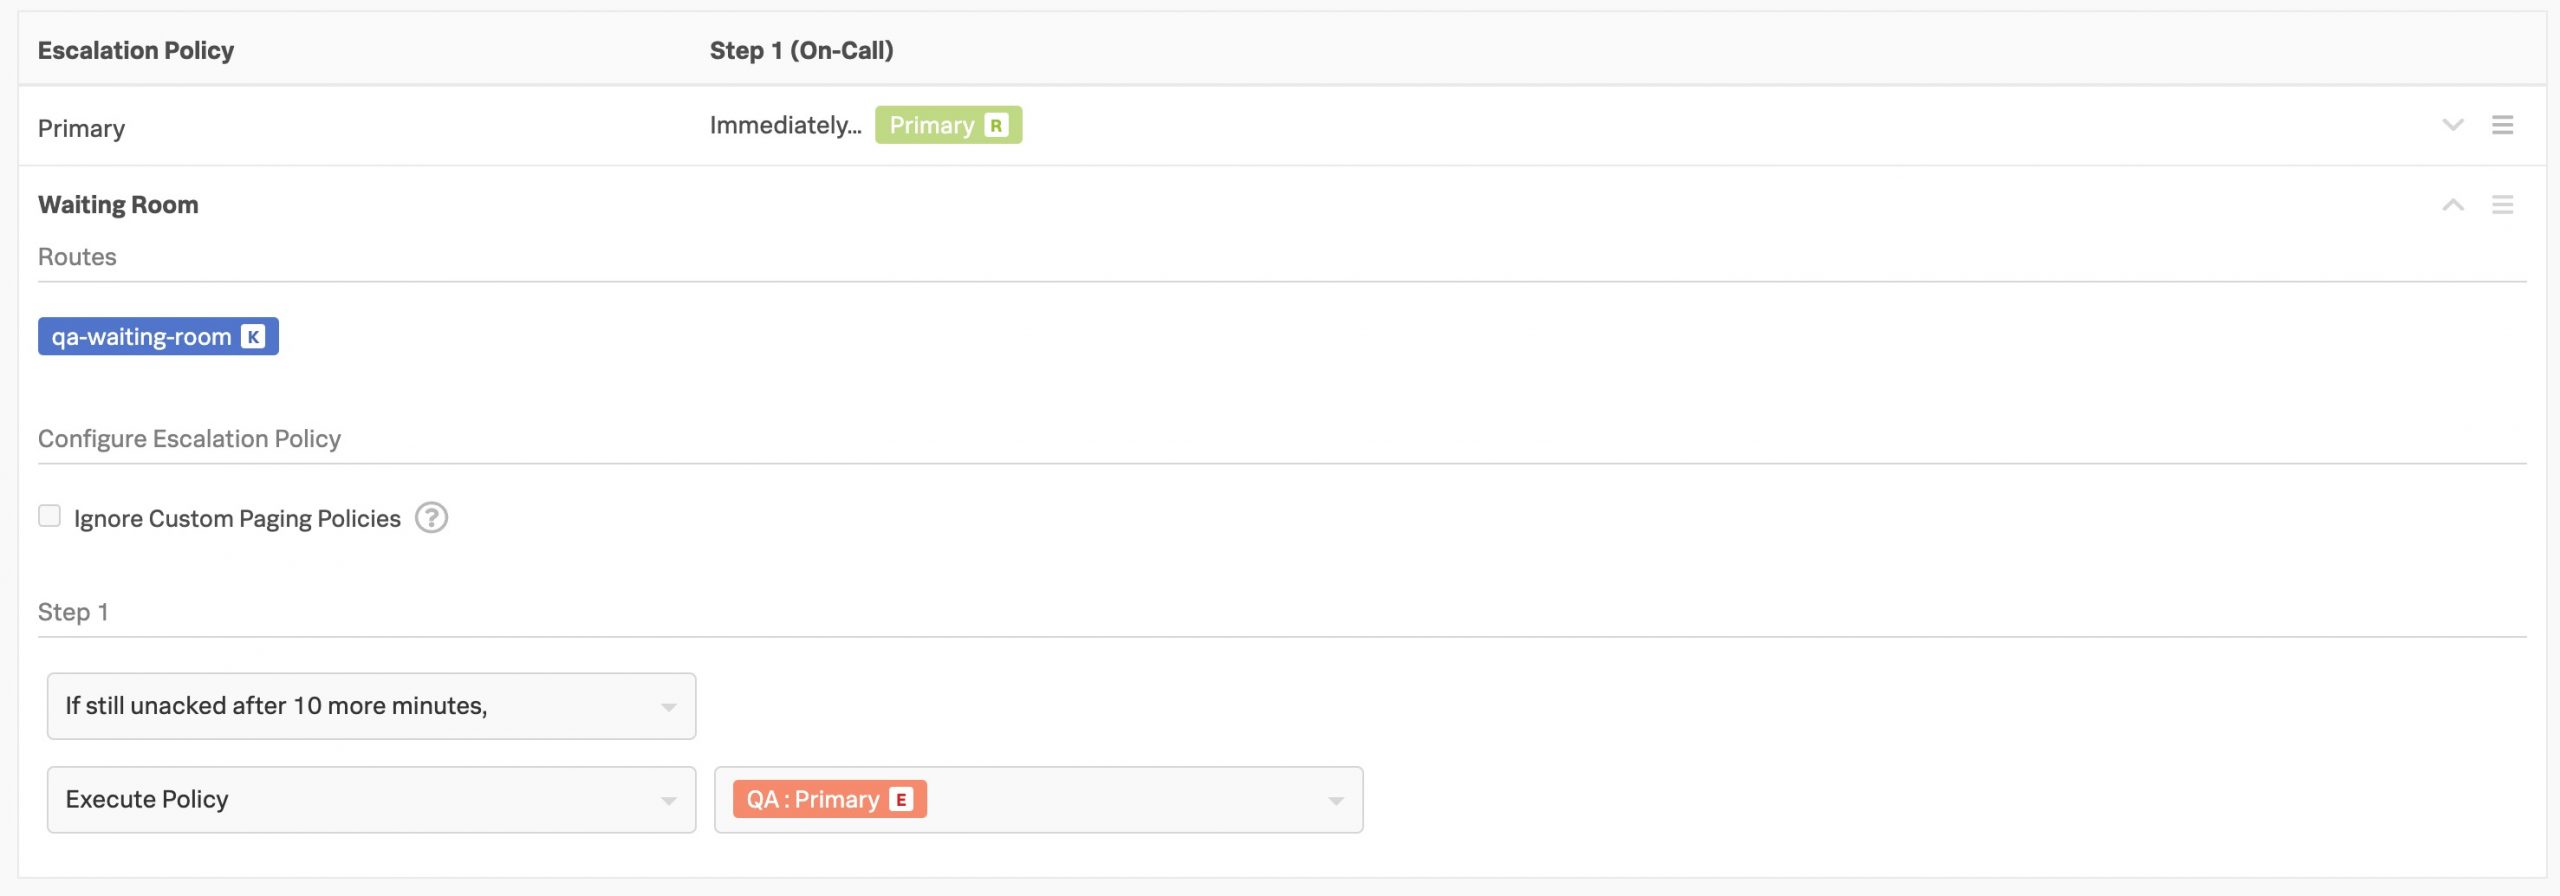
- Create a second escalation policy within your team called Waiting Room. Create a routing key (used to send alerts to the Waiting Room) and append it to the policy.
- Next, designate the amount of time you feel comfortable with the alert existing prior to paging a human (i.e. 10 minutes)—set this amount of time as the first step in the Waiting Room policy.
- Lastly, once that amount of time has passed, reroute the alert to the Primary Policy. This is achieved by selecting Execute Policy as the action and designating the Primary Policy for the reroute.
Alerts that are routed to the Waiting Room policy will delay paging for the time specified in the first step, allowing time for them to auto-resolve before waking you up.

Tip 3: Surface Secondary On-Call Schedules in Your On-Call Calendar
The second step of an escalation policy will not appear on your on-call calendar nor can overrides be scheduled for these shifts. If your company treats secondary on-call as ‘on-call,’ here’s a tip to get VictorOps to surface secondary in the on-call calendar and enable scheduled overrides for these responsibilities.
- Create a secondary escalation policy in your team for users who will be backup (i.e., on-call for the second step). This policy will have one step immediately notifying the rotation you have designated for backup users.
- In the second step of your Primary Policy, select the Execute Policy action, and reference the Secondary Policy.
Tip 4: Schedule an Override for a Single Escalation Policy
Scheduled Overrides are on an Escalation Policy basis, and you may request coverage for a single policy. When you schedule an override, Splunk On-Call will centralize and surface all the policies that would result in a page to you directly. If you don’t require coverage for a particular policy, simply don’t assign anyone to cover that specific policy, or assign it to yourself (original user) and VictorOps will continue to alert you.